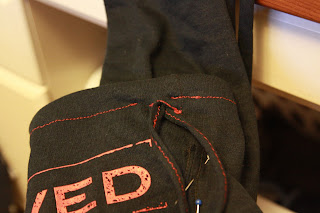
Step #1 - Cut open your t-shirt and get ready to cut out your fabric.

Step #2 - Roll your yoga mat up and measure. Length and width.

Step#3 - Cut out the rectangle for the body of the mat. Make sure to leave enough space for seam allowance and a drawstring at the top.

Step #4 - Make sure the circle circumference is the same as the length bottom of the rectangle (shorter side). Double check the size with the rolled up yoga mat.
 You will also want to cut a thin piece of fabric for the draw string and either one or two strippes of fabric for the handles. Length and thickness depends on you. I used the shirt fabric for this as well and cute the handles about 3-4 inches wide, the length of the bag. The tie I cut 1-2 inches wide about 20-24 inches.
Step #5 - With right sides together, stitch up the long side of the rectangle - body of bag. I did two rows of stitching for durability.

Step #6 - Pin and sew the circle to the bottom of the bag.
 Helpful Hint: I changed the stitch size to a slight zig-zag. This allows the stitch to stretch with the fabric, a bit.
Step #7 - On the top of the bag fold over 1/4 -1/2 inch for the drawstring. Once the edge is finished fold over again and stitch casing. Make sure to leave an opening for the tie to be inserted.

Step #8 - I zig-zaged the tied closed - nothing fancy.

Step #9 - Attach a safety pin and thread tie through casing.

Step #10 - Make sure to make some sort of opening for the ties to come through to the front. I made a make-shift button hole, and closed the seams up (not pictured).

Step #11- For the bag handles I used strippes of shirt fabric. To finish the edges, I zig-zaged the edges again (do you notice a trend?). By zig-zagging the edges, it helps prevent the fabric from ripping or fraying, but it also allows the fabric to roll - which is what I wanted the handles to be able to do.

Step #12 - Attach the handles to the bag. I sewed them on he outside of the bag rather than inside the bag seam. Potentially you could sew the handles inside the seam for a nicer look. I wanted this bag to be a little more frayed and rough around the edges.

Step #13 - Admire your work! I made 2 straps. If you prefer, you can make just one. I wanted the option to wear the bag like a backpack (easier for riding a bike).


1 comment:
Great idea, I just need to buy a mat first :)
Post a Comment