 I've been making bias tape at home for a long time. You can get the perfect color you need and it's a lot cheaper than buying the little packets at the store (limited color/no design choice).
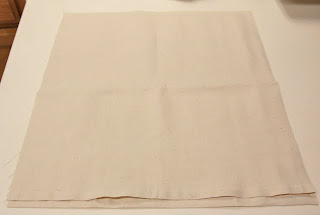
This tutorial will be using a half yard of fabric to create 1/2 inch bias tape.
Here we go:
 1 - I started with a half yard this time. If you need more (or want an extra abundance of one color/design) you can use a yard. However, this tutorial will not show you how to cut and add the back the extra fabric.
 2 - Fold over the ends to make a 45 degree angle. This angle is the "bias". Notice how I folded both sides of the fabric. You should have something that looks like a parallelogram when both sides are folded.
3 - Cut on the fold (pictured below). This will take the folded-in flaps off the parallelogram.

4 - Draw lines 2 inches apart. If you have a rotary cutter clear ruler, use it! I do not and so I cut out a 2" poster board ruler guide for myself. Start measuring from the diagonal line you just cut/created.
 Cut off any extra fabric that is not 2" at the end. This strip was just under 2".
5 - Next label each section with numbers. Start on one end of the fabric and number the sections 1, 2, 3, etc. On the other end of the fabric start 0, 1, 2, 3, etc.
*So the far left of the top of your fabric will start with 0, 1, 2, 3, etc. The bottom far left will start 1, 2, 3, etc. The section at the top left starting with 0, will have a 1 at the bottom of that same section. I hope I didn't lose anyone.

6- Bring your fabric around to create a "crooked tube" - if you will. Match the numbers up with their correct number. The section with zero will not match up to another number.
 7 - *Pin the lines together. Make sure lines match up exactly!! This is very important to ensure correct width of bias tape for the whole length.
*I've found matching lines up about a quarter inch (my seam allowance) below the raw edge of the fabric helps keep lines in a straight line. Once you pin the fabric together 1/4" from raw edge, fold the seam allowance open to make sure lines still match up.
8 - Sew tube closed. You should have one unmatched section at the one end of the finished seam/tube, and another unmatched section at the other end of the seam. (unmatched section pictured below on the far left)

 9 - Cut along the lines. If done correctly, you should have one continuous strip of bias tape. Check before cutting!!! If your sections dead end, check steps 6 and 7 again.
10 - Iron bias tape. Fold tape in half and iron. Bring in each raw end to center fold. Iron again. (pictured below).

11- Roll up.

I hope this tutorial helped. Please let me know if you get stumped or confused at any step!

3 comments:
http://creativelittledaisy.typepad.com/creative_little_daisy/2007/11/diy-version-of.html
Check out this little link, It saves so much time ironing your bias tape. I was so happy I came across it years ago.
You know, I bought one of these, but it was too small. I think it was 1/4 inch. I need to get a bigger one though.
bet Pam can make bias tape with her eyes closed!
Post a Comment