Thursday, May 26, 2011

Giveaway Winner!

I used Random.org to generate a winner. It was #26 - Hippie Housewife!

"What a cute snack bag! My favorite food to take for lunch is pitas with a container of hummus. Bonus if I remember to bring some cheese too!"

Thanks to all those who commented. I have a lot of great ideas for lunch now. Humus is quite popular. I love humus wraps for lunch AND dinner in the summer.

Thursday, May 19, 2011

Snack Bag Giveaway!

Snack Bag GIVEAWAY!!
After making insulated lunch bags and snack bags for a while now, I've decided to give one away!

I'm giving this away because of Sew, Mama Sew's Blog. I didn't post this until after 9am and so I didn't make their list :( I'm vacationing and didn't get around to posting (I have trouble setting blog posts to be posted on a certain date)

I started making these bags after requests to match my reusable lunch bags. I've also found they are great for hiding "candy" treats from my son (he doesn't know what the contents of the bag are!). With small children and lunches/snacks on the run, these bags are a great way to save plastic bag waste. This Snack/Sandwich bag is 7" x 6.5"

This bag can be shook out, wiped down, or thrown in the washing machine for cleaning. To dry just lay flat or hang.

Here are more listed in my ETSY shop.
TO ENTER: Leave a comment with you name and e-mail so I can contact the winner. That's it! If you have time, tell me your favorite food to take for lunch.

Giveaway ends May 25th at midnight. I will contact the winner on May 26th.

Reusable snack bags can hold a variety of snacks: crackers, pretzels, carrots, sliced apples, cookies, dried fruit, candy - whatever you're in the mood for!

Wednesday, May 11, 2011

Zippered Boy Pouch

While I was on my pouch kick I thought I'd make one for my son. He loves to put his toys and anything else he can find into containers. I figured he would love this little treasure holder.

I used an old zipper I took off of something else - so there are little loose threads sticking out here and there. I tried to get as many as I could off. Back and front look the same. No variation here.
Yes, indeed he does put things inside.
I started taking out some receipts and papers that were on my desk and though I spotted something at the bottom of the bag. . .

Indeed I did. $30! I guess it's a good idea to check what he's putting into his containers every now and then AND to make sure what I leave laying around.
With even further examination I spotted $.26 Not quite as much but I just have to laugh at what this kid finds.

Party Button

Tuesday, May 10, 2011

Spring Top Contest 2011

I finished my Spring Top For the Made By Rae spring contest! Yeah! I've been thinking about what I would make for the past month and finally got a around to finishing it this week.

I started out with this top from Nordstroms for my inspiration. However, after drafting a pattern on my own I wasn't a huge fan of the scoopy neck line.

I bought THIS Simplicity pattern (2418) because it was similar to the shirt I wanted and tweaked it a bit. Because I didn't like the neck line, I made it higher and added lining inside. The original pattern was just hemmed at the top. I didn't like the idea of a straight hem that could be flipped over at anytime to see the inside of the fabric. I realize that my shirt isn't much like my inspiration shirt, but that's okay. I'm happy with what came out of the process.

I bought the fabric last fall at JoAnn fabric right after I found out I was pregnant. Instead of making something then, I figured I'd wait until after the baby was born.

Here's the shirt:
I'm not quite ready to be wear fitted tops yet after just having a baby. Thus the choice for a looser front.

SLEEVES:
The sleeves are capped sleeves with a lined panel over the shoulders dipping down in the front and back.
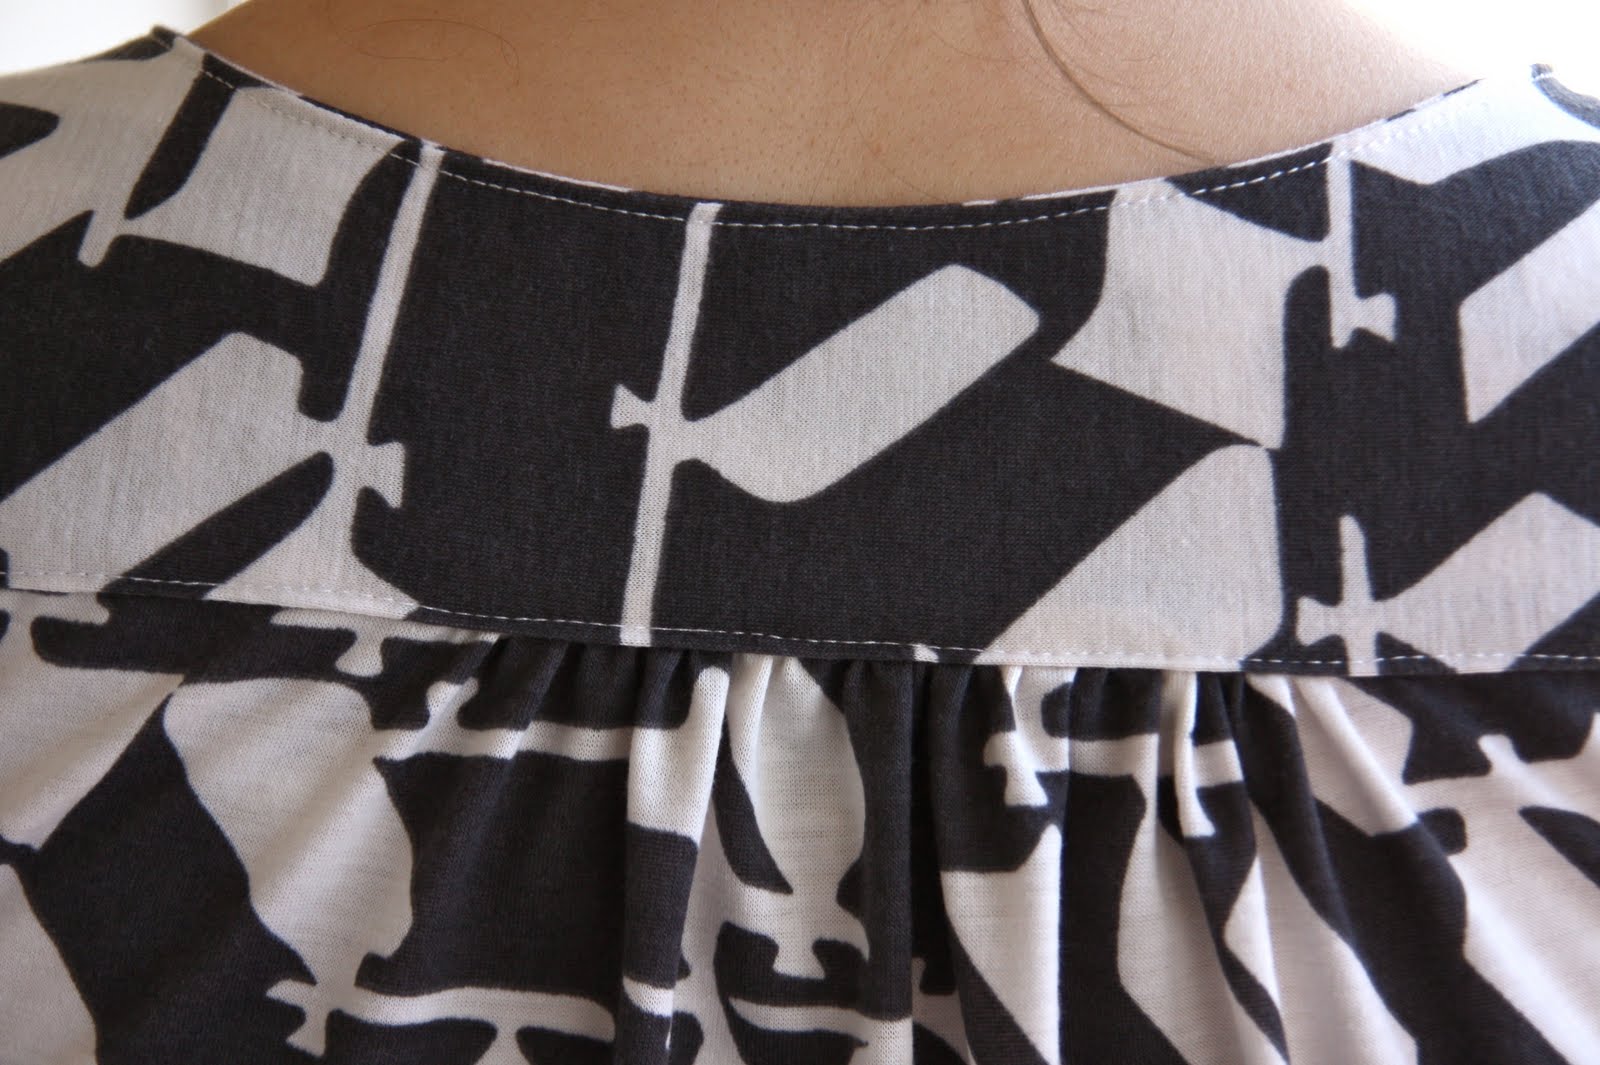
BACK:

My favorite part of the shirt is the gathered back. It just adds a bit of character to an otherwise plain back.

NECK:
As I said above, I wasn't a fan of the scoop neck. I actually raised the neck line up a bit.

There are 3 gathers on each side of the neck line. These are from the original pattern.

FRONT:


One last look at the final project.

Head on over to the Made By Rae blog to see how you can view the others in the Flickr pool.

Headphone Helper

Recently we purchased some DVD players for our car. We bought a set of headphones for my son so he could listen to the movies (and we didn't have to). The headphones were too larger for my son even at their smallest setting. My husband asked if I could sew something that could go around them to keep them up on his ears - rather than sliding down below his ears. Sure! I said and quickly made what you see below.

The fabric choice wasn't my husbands favorite. I literally used the first piece of fabric I found since it wasn't going to be an attractive pad anyway. He thought I should have used black, which I guess is probably true.

I made a padded rectangle with velcro on both ends for fastening around the top of the head phones.

They work wonderfully in the car and at home. My son likes to use my husbands iPod for playing games and listening to music. He likes the novelty of headphones. Now they fit perfectly!


(I know this isn't "clothes" but it's still something for my son that I wiped up really fast. He's "wearing" it so I feel like it counts. )