Showing posts with label Tutorials. Show all posts

Monday, December 13, 2010

Little Boys Tie

A few months ago I made this tie for my son using THIS pattern from The Pearl Bee's blog. It was amazingly simple and looks just like a "Daddy" tie.

There are simple directions about each step on her tutorial. All of it is done by hand (so for those of you without a sewing machine yeah!!!). I found it took me a lot longer to hand sew it than I had planned on. Oh well, that's what a good movie is for right?


Thursday, November 4, 2010

Where's Waldo Costume

My husband and I were "Where's Waldo and Wenda" for Halloween a few years ago. This year we recycled his costume and used it again!! My pregnant belly couldn't fit into mine.

How I made Waldo:

Shirt: I looked everywhere to find a red and white striped long sleeve shirt with one inch stripes. No luck. I finally decided to make my own. I bought two red long sleeve shirts at Goodwill. I then bought some knit white fabric and sewed my own stripes on the (inside out to hide the writing) red shirts. Make sure to use a small zig-zag stitch to allow your fabric to stretch when putting it on. Otherwise it will be a tight fit!

Glasses: Dollar store. I took out the glass that came with a pair of cheap reading glasses.

Pants: Nice Goodwill find if I don't say so myself.

Hat: Not the best hat in the world, but it did the job. White knit fabric with a red stripe sewn on the edge. There is also a red pom-pom on the top (can't tell in picture). I spent so much time on the shirt I didn't have much gusto left for the hat.

Cane: Not pictured and none was used. Thrift store or PVC pipe??

Shoes: Waldo's shoes are really brown, but my husband wore black.

Thursday, July 29, 2010

Taking in Wide Legged Pants - Gaucho's


I have a pair of gaucho's that I used to dance in during my undergrad. I love the cotton fabric and cute waist at the top - but I don't love the huge legs that look like a skirt!
I decided that if I'm going to enjoy wearing them again I need to do something about the extra wide leg!

(Sorry this picture is VERY yellow)

I turned my pants inside out and pinned a new seam line. After I pinned them, I tried them on for fit - checking to see if I would actually accomplish my goal of taking the leg in enough.
Once the pins were in the perfect spot, I did a basting zig-zag stitch (because it is knit fabric I wanted the stitch to give a bit. A straight stitch doesn't allow for give).

Once the basting was done and I knew the pants were how I wanted them, I surged over the zig-zag stitch. Perfect!


make it wear it


Life as Lori


giveaways

Friday, March 26, 2010

Serger Basic Tips - Starting and Ending a seam

Starting a seam hiding the loose serger thread:

Start your seam holding the loose thread out to the side.

Take the thread and bring it forward.

Cross it over the new seam and serge over it.

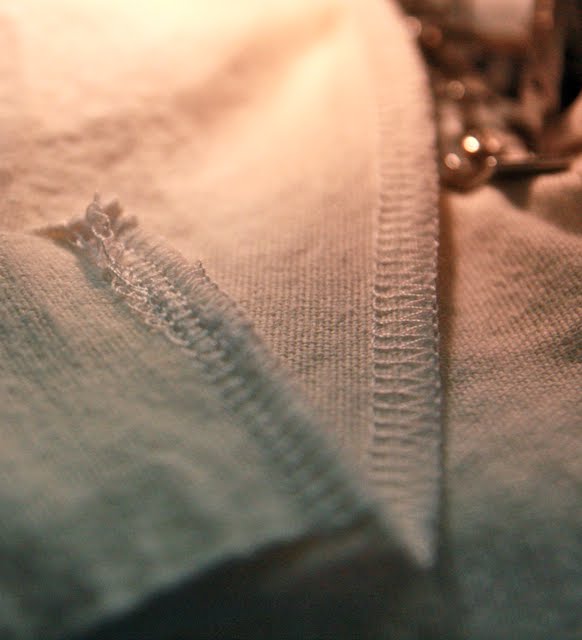
Your finished seam should look something like the above picture. A nice finished edge.

Ending a seam and the loose serger thread:

Serge to the end of your stitching line.

Give your thread a little slack by pushing your finger against the two needle threads. You will need this slack for flipping your fabric over. Turn your fabric over (keeping the end as close to the needles as possible) and 180 degrees. You will make your finishing stitches over what you've just stitched. Stitch down a few inches and cut off extra (I still like to tie my extra in a knot).

Tuesday, March 16, 2010

Pack n' Play sheet

The plastic mattress pad in a pack n' play shouldn't be slept on - at least in my opinion. I usually bring along a twin sheet or a large baby blanket to put over the mattress. I won't lie, it's a pain and with a child who doesn't stay put in the night it usually comes up. I finally decided to simply make a pack n' play sheet! That way my son would have a sheets the whole night with out getting tangled in them.

I simply measured both sides of the pad.

I used an old twin sheet and used those same measurements. It was 23 by 35. I made sure to use the finished end of the sheet for the top (see below). That way I would already have a finished edge to sew the snaps on.

I simply sewed up the three sides - leaving the already finished end at the top. Serging makes the ends much more finished.

Simply slide the sheet onto the mattress to make sure it fits. If it's a little too loose somewhere just take in that side to make it fit nice and snug.
The opened end needs to have snaps sewn onto it. I haven't quite gotten around to this yet. . . It's my project while watching "my show" tonight.

Doesn't it look so much more comfy?


DIY Day @ ASPTL

Saturday, March 13, 2010

How to Make Bias Tape

I've been making bias tape at home for a long time. You can get the perfect color you need and it's a lot cheaper than buying the little packets at the store (limited color/no design choice).

This tutorial will be using a half yard of fabric to create 1/2 inch bias tape.


Here we go:
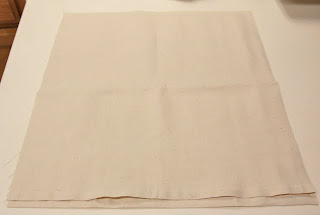
1 - I started with a half yard this time. If you need more (or want an extra abundance of one color/design) you can use a yard. However, this tutorial will not show you how to cut and add the back the extra fabric.


2 - Fold over the ends to make a 45 degree angle. This angle is the "bias". Notice how I folded both sides of the fabric. You should have something that looks like a parallelogram when both sides are folded.

3 - Cut on the fold (pictured below). This will take the folded-in flaps off the parallelogram.


4 - Draw lines 2 inches apart. If you have a rotary cutter clear ruler, use it! I do not and so I cut out a 2" poster board ruler guide for myself. Start measuring from the diagonal line you just cut/created.
Cut off any extra fabric that is not 2" at the end. This strip was just under 2".


5 - Next label each section with numbers. Start on one end of the fabric and number the sections 1, 2, 3, etc. On the other end of the fabric start 0, 1, 2, 3, etc.

*So the far left of the top of your fabric will start with 0, 1, 2, 3, etc. The bottom far left will start 1, 2, 3, etc. The section at the top left starting with 0, will have a 1 at the bottom of that same section. I hope I didn't lose anyone.

6- Bring your fabric around to create a "crooked tube" - if you will. Match the numbers up with their correct number. The section with zero will not match up to another number.
7 - *Pin the lines together. Make sure lines match up exactly!! This is very important to ensure correct width of bias tape for the whole length.

*I've found matching lines up about a quarter inch (my seam allowance) below the raw edge of the fabric helps keep lines in a straight line. Once you pin the fabric together 1/4" from raw edge, fold the seam allowance open to make sure lines still match up.

8 - Sew tube closed. You should have one unmatched section at the one end of the finished seam/tube, and another unmatched section at the other end of the seam. (unmatched section pictured below on the far left)
9 - Cut along the lines. If done correctly, you should have one continuous strip of bias tape. Check before cutting!!! If your sections dead end, check steps 6 and 7 again.

10 - Iron bias tape. Fold tape in half and iron. Bring in each raw end to center fold. Iron again. (pictured below).

11- Roll up.

I hope this tutorial helped. Please let me know if you get stumped or confused at any step!

Tuesday, March 2, 2010

Baby or Toddler Mittens

My 1 year old son needed something for his hands this winter. Knowing the thumb hole in gloves are useless at his age, I constructed some thumb-less "mittens" to keep his hands warm this winter. I folded over some fleece (I conveniently had in my closet) and rounded the tops. I made sure the length was long enough to go up his wrist/arms so they wouldn't fall off as easily.

Here's a look at the inside and outside. I would have used my surger but it was in my sleeping sons room at the time. I made a stitch and then zig-zagged the edges. I probably didn't need to zig-zag it, because fleece doesn't fray.


Works like a charm!

For added protection and warmth, I've put my ankle socks over the tops of these mittens. That way the socks get wet leaving the inside mittens mostly dry (I do have to brush the snow off right away to keep it from melting to the inside).


DIY Day @ ASPTL

Sunday, February 7, 2010

Gingersnaps


Ginger Snaps

1/4 c butter
1/2 c sugar - cream together

1 egg
1/2 c molasses - add to butter/sugar mix

Mix the following dry ingredients in a separate bowl:
1 tsp baking soda
2 c flour
1/2 tsp salt
1/2 tsp cloves
1/2 tsp cinnamon
1/2 tsp nutmeg

Slowly add the dry ingredients to the butter/molasses mix. It will be a bit sticky. Make small round balls (quarter sized) and roll each in sugar - covering well. Place on cookie sheet and flatten slightly. Bake at 400 for 9-10 minutes

Wednesday, December 2, 2009

Hemming Jeans - keeping the original hem, Method #2

As many of you may remember, I made a post a few months ago on how to hem jeans keeping the original hem . If you have forgotten, you can check it out here.

I have hemmed a few pairs of jeans that way and really like the outcome. However, it does take a bit of time. So today I tried another method for hemming jeans and keeping the original hem at the same time. I thought I would share:

Step 1:
Try your jeans on to decide exactly how much you need to take off. Divide that number in half and fold jeans up (bottom will be wrong side out). I took 3 inches off my jeans, so I folded them up 1 1/2 inches. Pin around both pant legs directly under the original hem.


Ste 2:
Use a zipper foot to sew a seam next to the old hem line. Do not catch any of the old hem! It will not lay correctly.


Step 3:
Iron your seam flat. Do this by laying your hem down and extra fabric up.


Step 4:
Once your hem is pressed flat, top stitch above the hem (the upper side of your first stitch line). This will give your pants a more finished look and will help your hem lay flat.


Step 5:
Cut away the extra fabric. You can zig-zag stitch the unfinished edge to help keep fray in check. I did not do this in the picture.


Finished!

I tried this method out on a pair of jeans I wanted to wear today. It was very quick! Can't beat that. The finished look is okay, but I still prefer my first method's appearance seen HERE . You can be the judge and pick the method you prefer! Good luck and enjoy those new pants!